A web app with a database
The pokedex
This application is a pokedex with a front coded in python that communicates with a PostgreSQL database through an API.
Here is the respository's link. You first need to fork the repository to your account.
1. Create the service
Then, go to Strio and create a service. Here is a guide explaining you how to do so.
Choose the repository of the forked project. If you haven't install Strio's agent yet, go to the first page of this group to discover how, it is required if you want to link Strio to a repository.
Now let's configure this service.
2. Configure the service
For this service, you need to configure two containers, one job and add one database. If you want more informations on how to configure those elements, go to the CONFIGURATION group.
First, add a PostgreSQL database in dependencies. Just select the latest version and size it as small. You can have more informations about how to configure dependencies.
Add a first container for the API which will communicate with the database. Check the box "Docker build from source", and change the context by ./back/. Strio will automatically go looking for the Dockerfile inside the folder when the deployment will be triggered.
Add a 8000 tcp port and the environment variables listed below. They will allow the API to communicate with the database. You need to substitute <DATABASE_NAME> by the name that you chose for your database.
| Name | Value |
|---|---|
DB_HOST |
$STRIO_<DATABASE_NAME>_HOST |
DB_USER |
$STRIO_<DATABASE_NAME>_USER |
DB_PASSWORD |
$STRIO_<DATABASE_NAME>_PASSWORD |
For this containers and the following you can set up the limits as follow:
| CPU Limit | Memory Limit |
|---|---|
| 100 m | 256 MiB |
Now, add a container for the front. Check the box build from source, and change the "context" by ./front/.
Add a 80 tcp port to your container, and the environment variables that will be use to call the API container. You need to change <API_NAME> by the actual name of your API container.
| Name | Value |
|---|---|
VUE_APP_API_URL |
http://$STRIO_<API_NAME>_PORT_8000/ |
Note that in this case, "http://" is needed because source code specify that the URL must be explicit .
Now that your containers are ready, the last step is to provision your database with data - a lot of pokemons!
In containers, add a container job. Name it, and check the box build from source, and change the context by ./back/. Specify the command to execute by:
python provision.py
Check the box "before deployment" - the job will be deployed before the other containers but after the dependency. Finally, you need to add the same environment variables than for the API container.
| Name | Value |
|---|---|
DB_HOST |
$STRIO_DATABASE_NAME_HOST |
DB_USER |
$STRIO_DATABASE_NAME_USER |
DB_PASSWORD |
$STRIO_DATABASE_NAME_PASSWORD |
That's all, you are now ready to deploy your service!
3. Deploy the environment
If you want more information on how to deploy an environment, go on this page:
For our example, click on the boxed test "New environment" on the left hand side of your screen.
Name your environment and choose the Git branch that you want to deploy. If you haven't created a new branch, choose the branch master, but it could work with any other branch of the repository. Your environment will be updated after each new push on this branch. Choose the time limit that suits you.
🔜 Budget limit is not available yet.
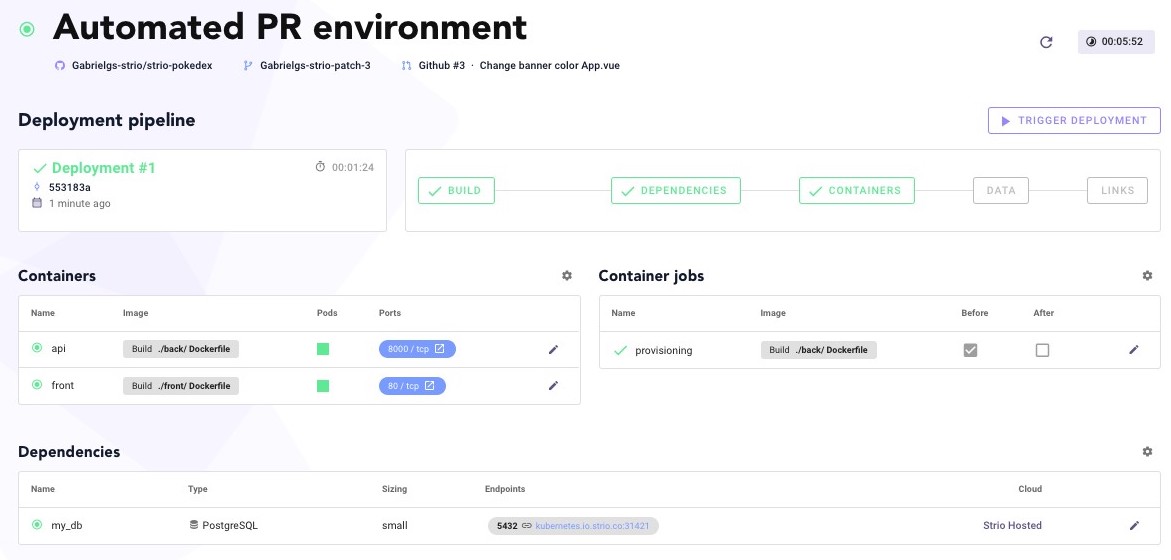
Click on deploy and the new environment will be deployed. The configuration will automatically be imported from the default configuration you set up just before.
On the dashboard, you can click on the front's port and access to the application.

You can also click on the API's port and you will get access to the database.
Now, let's say you don't like the color of the banner and want to change it.
4. Automatically deploy an environment through a pull request
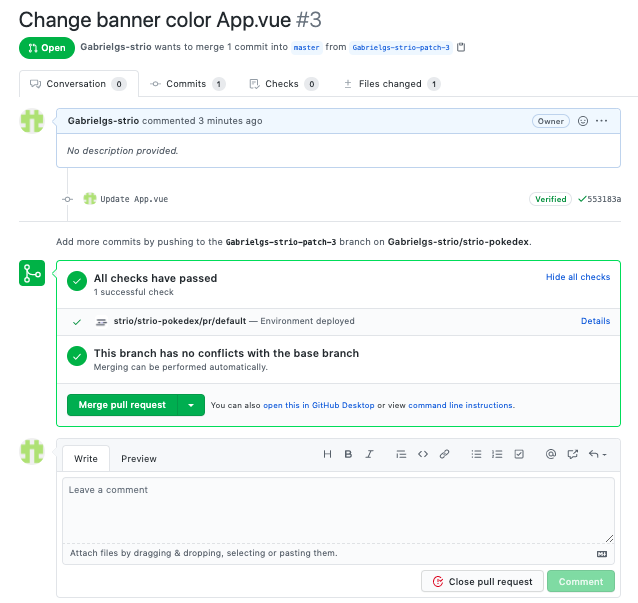
Go to the src folder, and to the app.vue file. You can change the color of the banner, line 5. Now create a new branch for this change and open a pull request. An environment will be automatically deployed by Strio. By default, when you link Strio to a repository, an environment will be deployed at each new pull request.


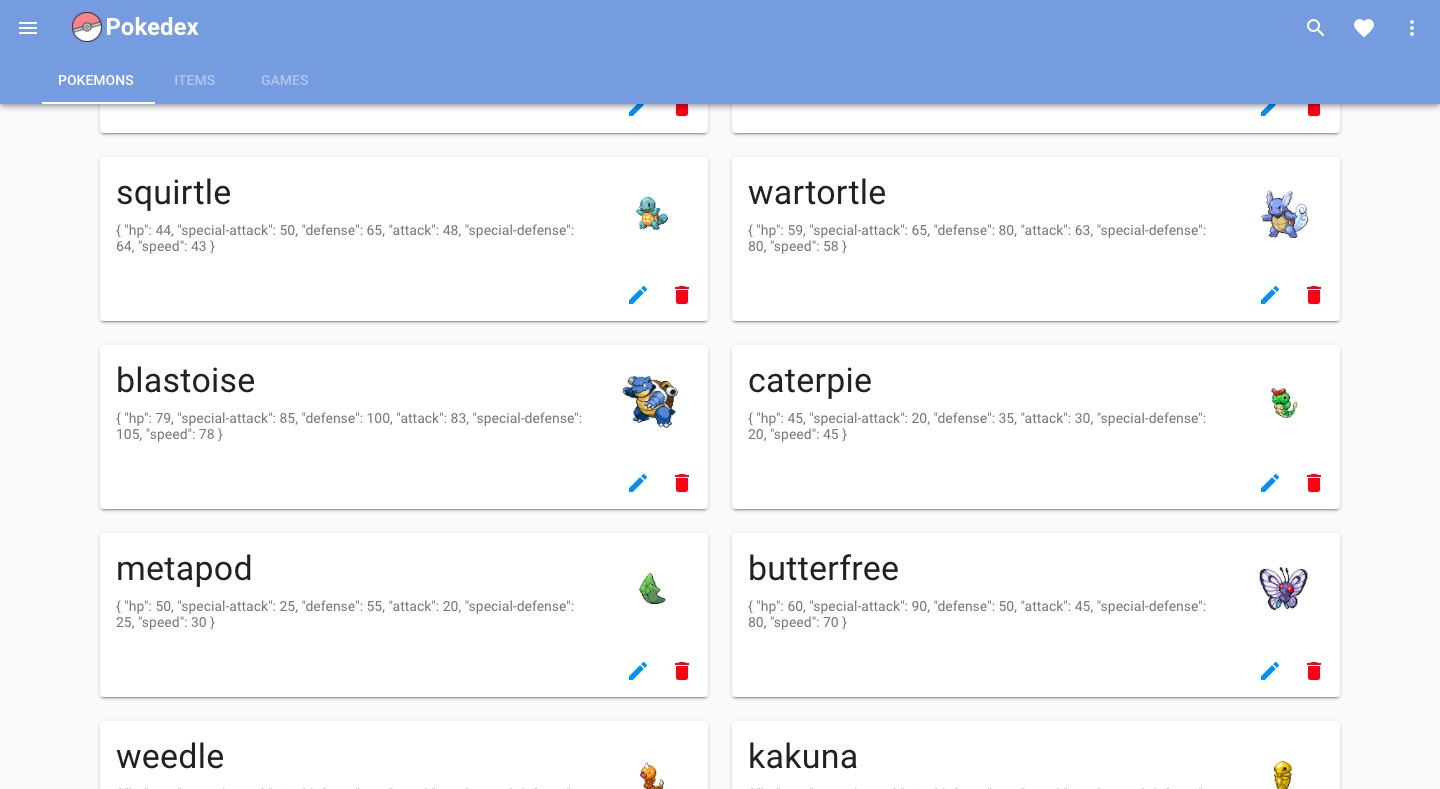
You can now click on the port and see that indeed if you scroll down the color of the banner changed from red to blue!

If you close the pull request, the environment will get destroyed.
This example is now over, go try Strio on your own projects!