Deploy an environment
Srio is organized around services and is mostly built to test them. As such, when you want to deploy an environment, you start from a service - the service you want to test.

To deploy an environment manually, start from a configuration template of your service, and then do the modifications that you need. There are 4 elements that you can configure.
| Name | Description |
|---|---|
| Containers | The containers of your service |
| Dependencies | The dependencies of your service |
| Data | The data needed to provision the dependencies of your service |
| Service links | The other services needed to accurately test your services. You will be able to choose which of their versions you want to deploy with your service. |
You can find more about those elements in the configuration section.
Data and Service links are not available yet.
Now your environment is configured.

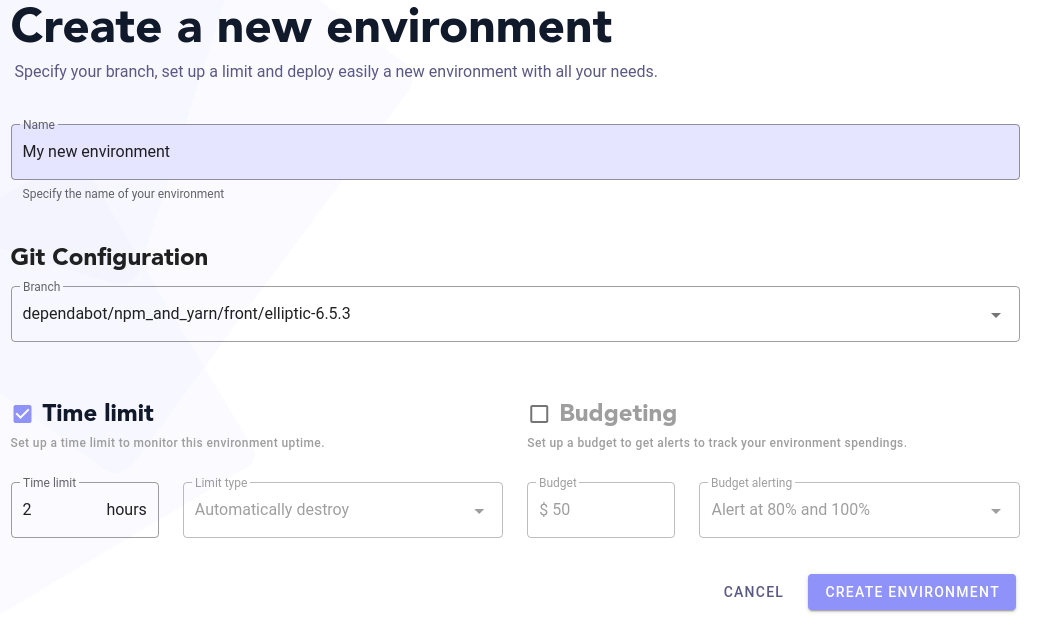
Before the environment is effectively deployed, there are few other elements you can configure:
- The branch of your repository that you want to deploy. You can choose any branch. Applicable only if you linked your service to a repository.
- A time limit. You can set up a time limit for environment. Once it is reached, the environment will be destroyed.
- A budget limit. Strio evaluates the infrastructure’s cost of your environment and will send you an alert once the environment reaches 80%, then 100% of the budget limit.
The budget limit is not available yet.
Once the environment is deployed, you can change its configuration (containers, dependencies, data and service links). Strio will then automatically suggest to update the environment by redeploying it.
Similarly, if you do a commit or a push, Strio will suggest to you to redeploy the environment, it will automatically take into account the changes.
If you’re done, you can choose to destroy the environment by clicking on "Delete the environment" on the upper right of the web interface, when passing on the environment's timer.