A simple nginx pod
The hello world application
This application is a simple nginx pod, perfect to get a glimpse of Strio.
Here is the respository's link. You first need to fork the repository to your account.
1. Create the service
Then, go to Strio and create a service. Here is a guide explaining you how to do so.
Choose the repository of the forked project. If you haven't installed Strio's agent yet, go to the first page of this group to discover how, it is required if you want to link Strio to a repository.
Now let's configure this service.
2. Configure the service
For this service, you just need to configure one container. You can have more information about how to configure your containers on the following page.
Add one container and name it. Check the box "Docker build from source".

Strio will automatically go looking for the Dockerfile inside the repository when the deployment will be triggered. Finally, add a 80 tcp port to your container. You don't need to change any other field for this example.
You are now ready to deploy your service!
3. Deploy the environment
If you want more information on how to deploy an environment, go on the following page:
For our example, click on the boxed test "New environment" on the left hand side of your screen.

Name your environment and choose the Git branch that you want to deploy. If you haven't created a new branch, choose the branch master, but it could work with any other branch of the repo. Your environment will be updated after each new push on this branch. Choose the time __budget limits that suits you.
🔜 Budget limit is not available yet.
Click on deploy, the environment's configuration will automatically be imported from the default configuration you set up just before. Strio will first build the container and then deploy it.
On the dashboard, you can click on the container port and access to the image of your container.

As you can see, with the name of your GitHub account of your environment, it's really your environment that has been deployed.
Now, let's imagine that you don't like the color of the button and want to change it.
4. Automatically deploy an environment through a pull request
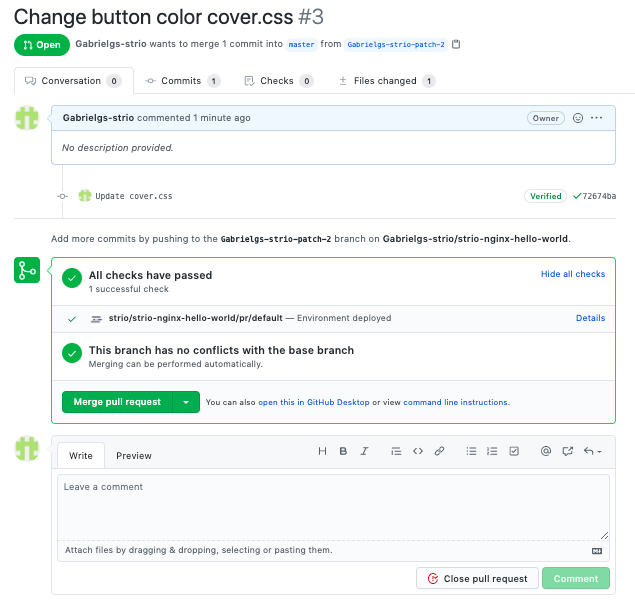
Go to the src folder, and to the cover.css file. You can change the color of the button, line 22. Now create a new branch for this change and open a pull request.

An environment will be automatically deployed by Strio. By default, when you link Strio to a repository, an environment will be deployed at each new pull request.

You can now click on the port and see that indeed the color of the button changed!
If you close the pull request, the environment will get destroyed.
This example is now over. If you want to test Strio on a more complex project, you can do the second example. Just follow the example by clicking on next below.